Remember this skirt:

...that I turned into this:

For any of you interested in doing this
EASY transformation, here's how I did it.
Let me just tell you before we get started...
my pictures suck! There's just no way around
that at this point so I just had to make due
with the pictures I had. I hope between the
pictures and the written instruction, you
will be able to follow.
First off-start with a long skirt. I got
this skirt at a local thrift store for $5.
It can be any material but I recommend a cotton
or polyester blend....these will be easiest to hem.
IT HAS TO HAVE AN ELASTIC WAISTBAND!
Next-put the bra on that you intend to wear
with the dress once it's complete....this is important
because you want to make sure and place the
straps of the dress so they cover your bra straps.
Put the skirt on and pull it clear up over your boobs
in order to determine how long you want it and
how much you'll need to take off the bottom.
Place a pin where you want the length to be.
Take the skirt off now and let's begin!
You've marked with the pin where you want
the length of the skirt to end up so we need
to add a bit for a hem allowance. From the
point of the pin, add an inch towards the bottom
of the dress (this is our hem allowance) and mark
with your marking pen or chalk.

Now, you will need
to measure the distance of the bottom of the original
hem to the mark you just made.....mine was 3".
Now go around the entire skirt, making a
mark every couple inches to determine where you
will need to cut. Be sure to measure from the bottom of
the original hem in order to ensure a straight
hem on your new length.
Once you have marked around the entire skirt,
you are ready to cut. You will basically just
connect the marks you just made while cutting
with your scissors or blade.

Be sure to lay your skirt out so that you
are only cutting thru ONE LAYER!
Also-you need to cut this off in one continuous piece.
This fabric we just cut off will be used for our straps.
Once you have completed cutting the bottom of the skirt
off, put that piece to the side...we'll come back
to it in a minute.
Let's go ahead now and put a new hem on the
bottom of the skirt. I turned mine over 1/2" TWICE
so I had a finished edge. Mark it with your
seam gauge, pin and iron as you are marking it.

Now go ahead and sew it.

Next we are going to make our straps.
Take the big piece you just cut off from the
bottom of the skirt. Determine how wide you
want your straps to be. If the piece you cut off is
extremely wide you'll need to cut some of it
off again so it's not too bulky. I simply
folded the unfinished edge over to meet the
center of the already finished edge and that was
perfect (My straps are 1.75" wide).

Go ahead and iron it down.

If you have a serger I would recommend serging
the raw edge before you fold it over and iron it
down. However, I don't have a serger so I didn't
finish the edge first.....I figure it won't show and
I didn't want to take the time to finish the edge.
Hopefully it won't fray too bad when I wash it.
Now you can sew the piece down.
I went ahead and made two stitch lines down
the length of the strap in the center because I thought it
looked better that way. Depending on the type of
stitch that was in the original hem, you may already
have a visible stitch. If this is the case-be sure to
sew this down using the existing stitch as a
guide to determine the distance apart for the 2nd
stitch you are about to put in. Does that make sense?
You want the stitches to be straight because
they will be very visible on the straps.

Now you should have a big long piece of fabric with
finished edges. Go ahead and cut it in half.

This next part is MUCH EASIER if you have someone
who can help you. I didn't and it took me forever!
You need to determine the placement of the straps now
so put the dress on, pulled up over your boobs.
Remember to have the bra on that you intend to
wear with the dress. Have someone pin the straps
onto your dress both in the front and the back.

You are going to sew this right onto the dress
now but you don't want to sew thru the elastic.
You still want the elastic to be able to stretch and move
so be careful to pin and sew at the top and bottom
of the casing NOT thru the elastic.

Sew both straps on.
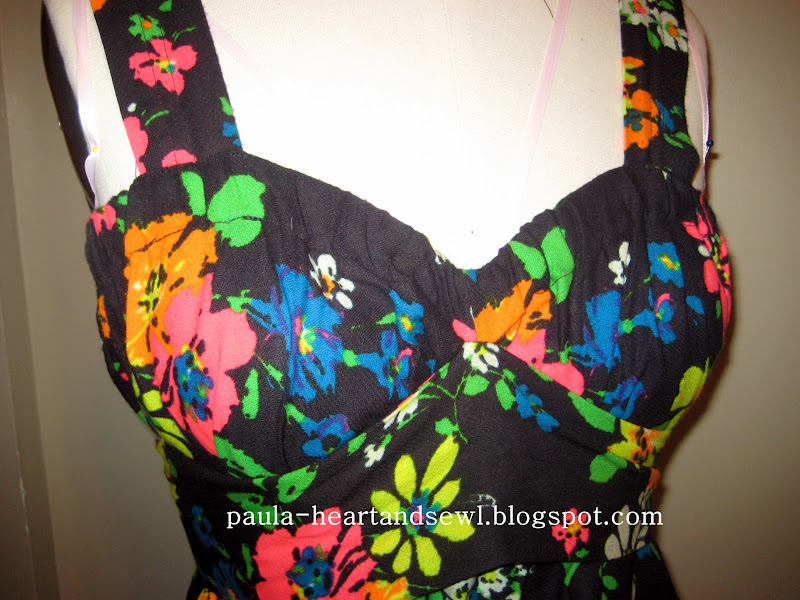
Almost done.....now we want to sew the sash onto
the front of the dress. This is what makes the
sweetheart-type neckline and fitted bust look.
The skirt I bought already had a very long sash attached
to it so I just used that. If you need to make one,
You can either use a scarf you already have
or you will need to sew another long strap that
is approximately 3.5 " wide and 6 ft long.
Most likely you won't have enough fabric from the
bottom of the skirt to make a sash with also.
That's OK. I actually think it would have
been cuter if I had used a different fabric for the sash.
(in fact-I'm going to try that next time)
If you have to make a sash from scratch-you will need a
piece of fabric that is 8" wide by 6 ft 1 inch long.
Fold it in half lengthwise, right sides together
and stitch it together using a 1/2" seam allowance.
Do not sew the two ends.
Now you turn it right side out by pulling
one end thru to the other end. Iron it
and after turning your ends under,
sew the ends shut.
Now you have your sash.
Fold your sash in half lengthwise and pin the
center of it to the center of the bust of your dress,
right directly underneath the bottom stitch
from the elastic casing.

Stitch this onto the dress,
being sure again to not stitch thru the elastic.
You don't need a long stitch line for this because
you want it to be sewn onto it with just
a SMALL stitch length.
Mine is only like 3 stitches that I just
re-enforced several times using my back stitch.
THAT'S IT!
You're done.
Put the dress on and pull the sash down underneath
your boobs and pull tight around to the back.
Tie and adjust as you need to.

Voila....
a new sundress made from a skirt.
Guess what?
You just made a dress that can be worn 3 ways.
If you want more coverage in the front you
can turn it around and wear it like this:

This offers more coverage in the boobie/cleavage
department....the tie is in the front now.
I don't have pictures of this but you can also
wear it as a maxi skirt with a sash tied at the waist.
I've worn it all 3 ways and trust me.....
it's equally as cute each way!
Again, I apologize for the crappy pics in this
tutorial......the tutorial took me longer to
create than the entire dress did!
Linking up with Positively Splendid.
and

No comments:
Post a Comment