Showing posts with label DIY gift ideas. Show all posts

Saturday, January 28, 2017

~turquoise-pearl-tassel necklace~

i love mixing elements that don't necessarily
go together, yet somehow they do. 
the eclectic taste of it....delicious.

turquoise. pearls. tassels. gold.
sounds like a lot...
(throw in some lace and velvet and it smells like a brothel).
the result turned out to be a 
simple, bohemian'ish vibe.

i made two of these yesterday.
birthday gifts for a couple of friends.


i think i need to make one for me too :)

Saturday, January 21, 2017

~Embellished Shepherds Hook for Houseplants~

last weekend i blew the dust off my jewelry making supplies 
and attempted to make some birthday gifts 
for a few important ladies in my life. 

normally i have ideas coming left and right and 
i have to reign things in to hone in on the project i have in mind. 
this time....nothing.
although i had a strong desire to create something,
i had no creative inspiration.
i tried to force it.
 the end result of the earrings i made....
not good. like REALLY not good.
(susie-you'll be glad i went and bought you a necklace instead) 

in the past couple years i've only dipped into
 the creative parts of my brain sporadically.
i'm creatively out of shape.

i decided to ditch the gawd-awful earrings and re-group.
i needed to make something that i didn't have to think too hard about.
last summer while at a local garden store i saw 
some beautiful embellished shepherds hooks for houseplants. 
i've been wanting to make one ever since. 


in the end, i made two of them but only gave one away.


 my little lady and i have decided to do "a craft" (as she calls it) every weekend.
a couple weeks ago we made our own dream catchers (i'll share pics soon).
i think today we'll work on some valentines day projects.

hope you all have a great weekend!
-paula 

Thursday, January 10, 2013

~home-made potpourri~

 I received some great hand made gifts from friends
over the holidays. This is one of them.
 Home made potpourri that simmers on your stove.
FABULOUS friends! 
It smells so good.

Here's how she made it:
-2-3 lemons sliced 
-tablespoon of vanilla
-a sprig of rosemary
-fill the rest of the jar with water

Pour some in a pan and let simmer on low
for several hours. You may have to occasionally
fill the pan up with water as it cooks away
but the smell keeps going and going!

Thanks Lyns....it's as wonderful as you said it was!
You can use it for a few days. Simply put back in the jar
after it's cooled and put it in the fridge until the next day.  
 
Pin It

Sunday, August 19, 2012

~little girls wire heart bracelet-EASY GIFT~

 Four of my eight nieces have birthdays
less than two weeks apart from each other in August.
YIKES.
I made a littler version of my heart wire bracelet for
my niece's 4th birthday party.

To package it I had my kids trace their hands
on a piece of card stock and we poked holes
thru it where a bracelet would be worn.
We looped the bracelet thru the holes and 
the kids wrote her a little note. 
I decided to wrap the wire with a piece of
fabric to give it a more juvenile look.
I loved the way it turned out and I think she did too.

 We wrapped it in tissue paper and put a pretty ribbon on 
it and.....VOILA! 
Done.
Easy. Personal. Realistic. Unique.
Pin It

Sunday, April 15, 2012

~DIY bridal shower gifts~

 Need a good idea for a bridal shower or wedding gift?
I made all this for my cousin's bridal shower for $25.
Some of the supplies I had on hand, which is why 
it was so cheap but even if you had to purchase them,
it would still be inexpensive. 

The theme of the bridal shower was
"let's help them fill the rooms of their house"
My room assignment was the living room.
I browsed thru their online registry at Target and Walmart
to give myself an idea of what their decorating colors 
and style will be. 

They are registered for shelves so I decided to 
give them things they could decorate their shelves with.
This is what I came up with:
 Photos printed onto tissue paper and mod-podged onto
canvas. SO EASY! I used some of their engagement pics.
If you want to learn how to do this check out the
tutorial at Sarah's Never-Ending Projects.
This one is a 5x7. I used the flat canvas because I wanted
to frame them. You can also use the wrapped canvas frames
if you prefer. The flat ones are cheaper. I got a
package of three for $3 at Michael's.
 This one is 11x14.
I was worried at first when my tissue paper wasn't
going on smooth but in the end I like the way it 
looks being a little wrinkled.
 Initially I tried to do it with red tissue paper
because I didn't have any plain white and I didn't 
want to go buy any but it didn't look good on the 
bigger canvas's. So-with the red picture I had already printed,
I mod-podged onto a wooden "N" I got at
Michael's for $1.50. It looks better in real life.
The photo is very subtle and the red gives it a 
a nice pop of color.
 Another shot of the items they can put on their shelves.
I got the ivy plant at Walmart and put it in a small red
mug so it will fit on a small shelf. I paid $4.50 for the
plant and the mug combined. Also-the subway
art was purchased as Walmart for $3.50.
I almost didn't give it to her because I want
to keep it for my house. Maybe I'll go back and get one.

 This throw pillow was made with fabric scraps
I had on hand. To get the "N" monogrammed on the
pillow I used tape to mark off an "N" and then
lightly spray painted the fabric. Once the paint
was dry I pulled the tape off and voila...
I had an "N". I was going to use piping for
the edges but didn't want to go back to the 
store to get any so I just used red fabric I had
here to make a ruffled edge.

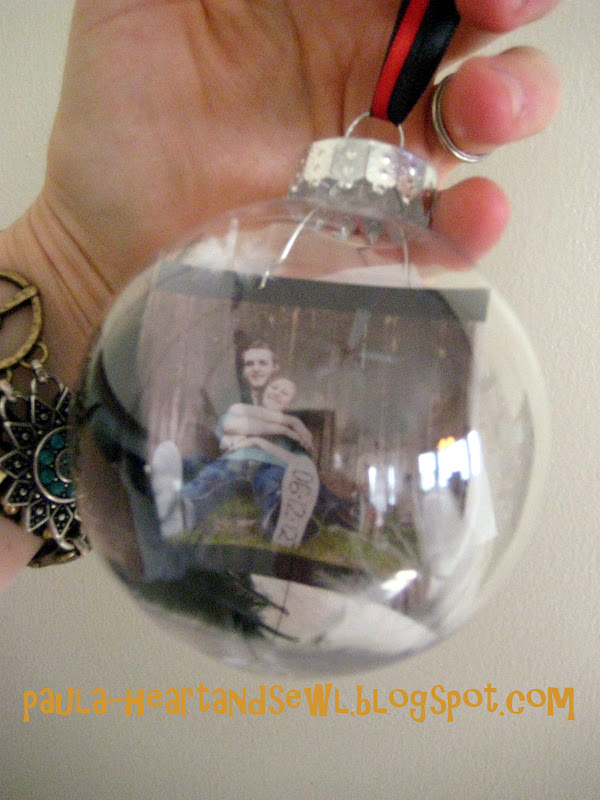
 I like to give newlywed couples
an ornament for their first Christmas.
That's what was in this package:
The package is an empty container of baby snack puffs
wrapped in tissue paper and ribbon.
I put some tissue paper in it and nestled the 
ornament right in the middle of it.
It was PERFECT!
Again, I used one of their engagement photos
to fill the bulb, some feathers and a saying about love. 
I had all these on hand.

If you want more info about making the
ornaments, you can click here . 

I was so happy with how everything turned out and I think
she did too. If you like the look of pictures
on canvas but don't want to spend a ton of
money doing it, this is the way to go!
I'm going to do some for my house next.
I can't wait!

linking up with kojo designs


Pin It

Total Pageviews