Showing posts with label home. Show all posts

Saturday, January 14, 2012

~for the home-"pinspiration"~

This week's edition of "pinspiration" 
will be featuring things I've found for the home.
But first...
This is the funniest statement about Pinterest 
I've yet to see:
This rings true for me because I love
Pinterest just as much as I hate football.

Now onto the fun finds.....
 I'm going to try this.
A good way to make your house smell like 
coffee without brewing a pot.
Plus I like the look of it.
 What a good idea this is.
Ikea spice racks attached to the sides of a dresser.
I'm all about stuff like this because of our lack of space.
 You have to know from all my different holiday decorations
and the way I use my mason jars that this is right up 
my alley. These were made to be used as wine goblets
but I would use them as a way to display 
different holiday decorations. 
It reminds me of a shabby chic apothecary jar.
 I saw this idea years ago in a magazine and
ripped it out. I've been looking for the perfect ladder
since then. However, I want to get this and
use it as a pot rack in my kitchen.
 If only I had an extra closet to make a little
reading nook....I would totally do it. 
And I'm pretty sure it would be my favorite spot in the house.
 Good idea to store all those spray bottles....
hang them on a tension rod. This site has a 
lot of other organization/time saving ideas too.
 I have wanted to have a window seat in one of my
bay windows for a long time now. This may be the perfect
alternative to a built in window seat. It's a bookcase
turned on it's side with legs and a cushion.
Love this....cheap and easy wall art.
These are shoe box lids covered with fabric and
hung on the wall.
I like this idea to keep things together and up
off the counter top. I keep all my stuff like this in 
a bowl or large vase but I think this 
gives your counters a cleaner look. 
I have some old sheet music of my Grandma F's
that I have been trying to figure out cool ways to display.
I might try something like this.

Hope you all had a great week filled with
lots of inspiration too :)

Saturday, January 7, 2012

~my sewing space~

Since I'm taking the month to do things for myself
(yeah right....it's not going quite as I had planned)
I thought I would tackle a HUGE chore I have
been putting off for months and months.
My sewing space.

I wish I could say to you that I have a huge room
dedicated to my sewing and crafting projects but
that would be a lie.
I have a corner in our basement.

Our house is not big and we utilize EVERY square
foot of it. When we had our first baby, we lost our spare
bedroom. When we had our second baby, we lost
our "computer room".  That pretty much left our
basement as the only space to accommodate all
these things. Our family room is long and narrow.
We sort of have it divided into two different spaces
with the couch in the center and butted up
behind that is a big bookcase.

The sofa has a pull out bed in it (a very comfy one
might I add....a Sleep Number Bed). 
Behind the couch on the other end is my sewing
space and now also the computer space.
There's a lot of stuff in a fairly small room.
We spend a lot of time down there so 
naturally we have a bunch of kids toys down
there too. It's crowded even when it's clean
and when it's not clean....it's just ridiculous.
Well-my side has been out of control for
a long time and I finally decided I'd had enough.
It took me a few days to get it done
(with a baby who won't sleep). Normally
I would have been able to bust it out in an
afternoon but everything is taking me longer
these days. Let me tell you in advance,
if you're expecting to see one of those 
beautiful matchy matchy craft rooms...
you will be disappointed. 

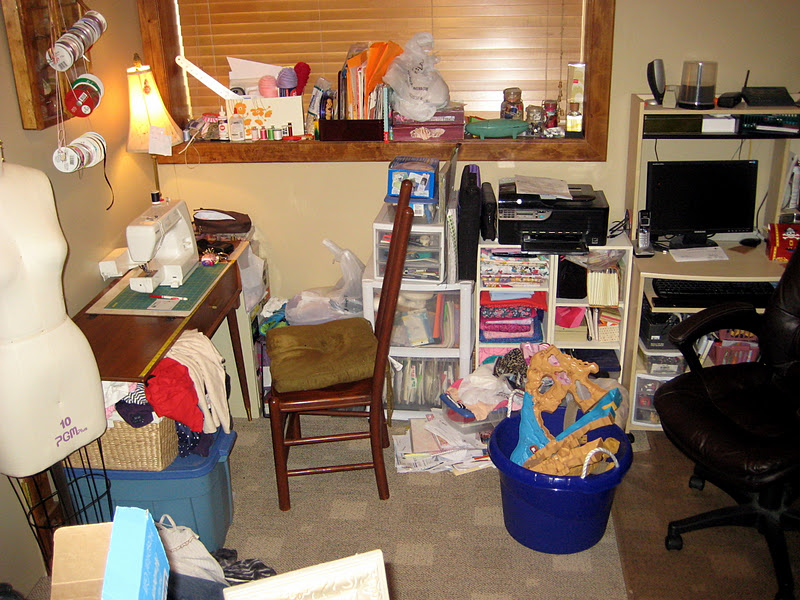
Here's the HORRIBLE before pics:
 Would you believe me if I told you I
organized this all about 4 months ago?
True story. It's amazing how fast
things can pile up. I have unfinished projects,
fabric, mending, etc. in piles all over!


How horrible is this?
You can't even see our window.
Now that I've aired my dirty laundry, 
let me show you what it looks like now.


I swapped spots with the computer and sewing table.
The taller table is one I got out of our R.V.
I didn't know the height adjusted to be that tall.
I was ecstatic! When I stand at it, it's just the
right height. This will save my back and it gives
me a good size work space. 
I've NEVER had that! YAY!
It's tall enough to fit my little shelves underneath too.
In the next couple weeks I'm hoping to make a curtain
to attach to the front and side lip of the table, 
hiding all the crap underneath :)
 I went thru all the books in my bookcase and
got rid of enough to clear out a whole side.
I used the empty side to store some of my
sewing and crafting essentials, which I also organized.


Praise the Lord for this! Do you know how much time 
this ribbon organizer is going to save me?
I just stuck the dowel thru the center of the ribbon spools
and attached the dowels to the holes in this little basket.
And what do you know?
We actually have a window.

I love walking down and looking at my clean and
organized space. I want to get some shelves for the 
wall above my sewing machine but that will come
with time....and money. 

Want to know what I did in the days before Pinterest
and blogging?
I ripped out things in magazines I liked and kept them!
This gigantic box is what I have to show for that.
I'm going to go thru it a little each day until
it's empty. It's way too big a project to tackle 
at one time.

Now, my next space to tackle:

The storage under our stairs.
iii yii yiii...
this could get dangerous.

Friday, November 4, 2011

~two-faced~

I love fall decorations.
I've said that before right?
Let me show you a trick I've been doing for
years with my pumpkins out on the front porch.

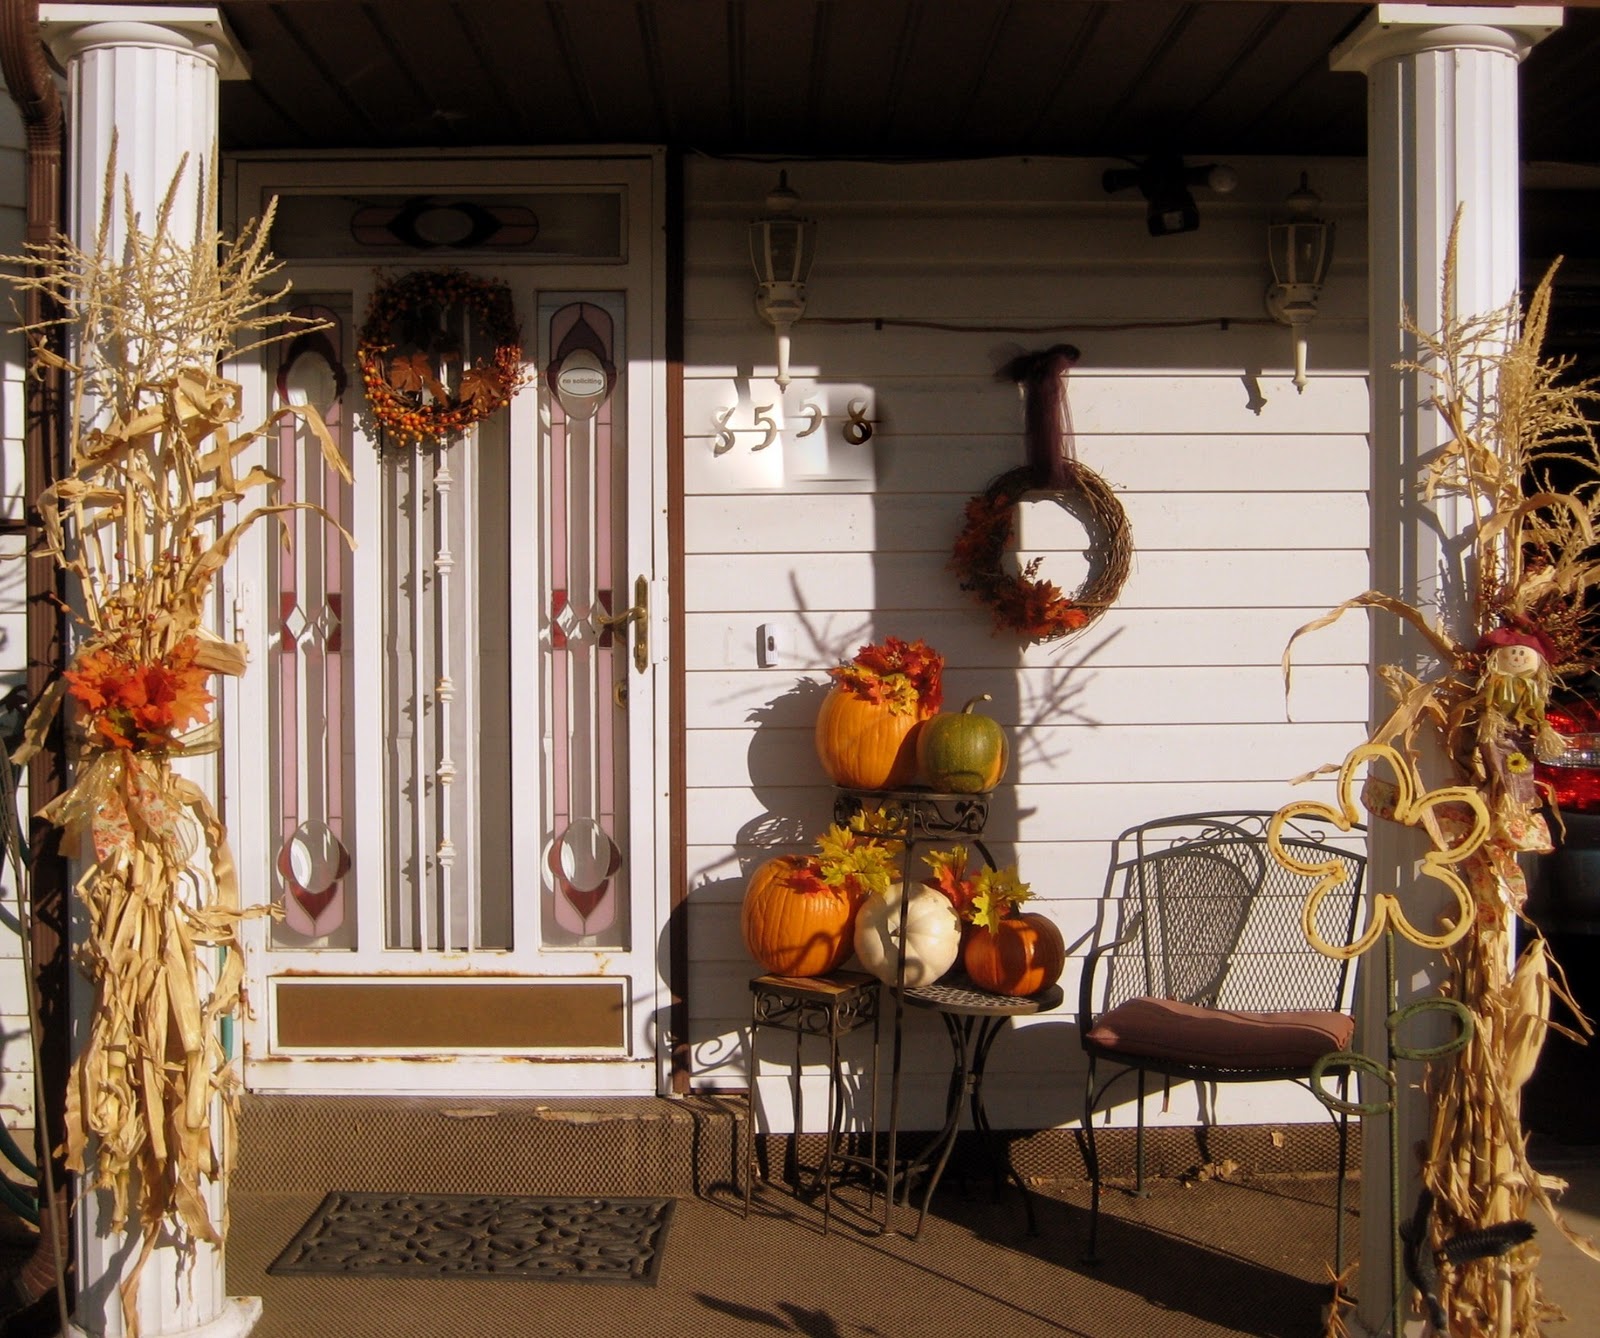
With the SAME pumpkins, I transform my porch
from this:
(nothing spectacular I know...I wasn't feeling it this year)
To this:
SAME PUMPKINS....just turned around and embelished a little.
If you are to get up close and look at the backside
you would see this:


Hey....I've got to get my money's worth.
Talk about getting your bang for your buck.
In years past the pumpkins have actually lasted 
until Thanksgiving without wilting and caving in.
I just turn them around and put some fall
foliage that I bought at the dollar store in and around them.
If you haven't already thrown out your jack-o-lanterns
TRY IT!

Monday, February 7, 2011

~silhouettes~

I love silhouettes and have been
wanting to make some ever since I
saw the idea in
Martha Stewart's Encyclopedia of Crafts


A friend of mine had a birthday coming up
and I knew when I saw these pics of her boys
on their skate boards, that these were
the exact pics I wanted to use.
I printed the pics up from my computer
and first colored in the image with
a black sharpie.

After I had the images all shaded in,
I cut out the image.
It took a while to do and I found that
my small crafting scissors worked better
than an exacto knife like the instructions had suggested.

After I cut the images out, I found the
paper I wanted to attach it to and cut it to size.
(these are 5X7)
To attach the silhouettes to the paper I used
those little round, thick stickers that
raise the picture up a bit from the paper.
(how's that for technical? still waiting for normal brain
function to return since having the baby.)

The last step is to put it in the frame.

So simple and inexpensive.
A bit time consuming but even
a beginning crafter can do this!

I can't wait to make some for my house now.

-For the life of me I cannot figure out why the text
is smaller here on the bottom. I've spent longer trying
to fix it than I did on composing this entire post!
I'm done.

Sunday, December 26, 2010

~christmas ornaments~

I made some cute personalized ornaments
for some of my family and friends this year.
Check them out:


They were super easy and I had so much
fun making them.
The bulbs are from Michael's craft store.
I got them 50% off ....they were .64 a piece.
I had some pictures printed at Walmart
as wallet sizes and backed the picture
with some decorative scrapbook paper I
had on hand.
Next I rolled the picture and inserted it into
the bulb, manipulating the picture as needed
with a pair of tweezers.
Now the fun part-inserting the berries,
feathers, snowflakes, etc, into the
bulb and rubbing the transfers onto the
outside of the bulbs.
These were also all things I had on hand.
The last step was to tie ribbon onto
the top of the ornament....also
used what I had on hand.
The end result....
a sentimental,
inexpensive,
personalized
gift for people I love.

Thursday, October 28, 2010

~chair re-do~


I've always wanted to re-upholster something to see
for myself how difficult it is.
Jay D's Grandma has a chair in her basement that
I have loved for years and years.
I told her quite a few years ago that if she ever
decided to get rid of it, I would love to have it.

Jay D brought it home about a month ago from
one of his almost daily visits with her.
I was SO HAPPY!
It is simple and small and I thought it would
be a good starter for that re-upholster project
I've been wanting to tackle.

Unfortunately, I didn't get any before pics of it put together.
I told Jay D I got the materials for it and he immediately
started taking the chair apart before I could get a pic.
Once he got it dis-assembled,
we had to take pictures of it before we took off the fabric
to remind ourselves how it was put together.
Here is one of those pics so you can see the material it was.


Here it is now.
I love the final result.
It's EXACTLY what I had in mind.
I got the fabric at Joann's during a 50% off sale.
I splurged and got the fabric I really wanted instead
of a cheaper one I had picked out.
I figured if I was going to put the time into it
then I should make it nice.
The fabric was about $50.....
I totally tapped into my mad-money funds for this.
The paint for the legs was some we had on hand.


I do wish I would have been able to
pull the fabric, pleats and buttons tighter
but I figure that will come with experience.
For now, I'll be satisfied as an amateur.


And I'm pretty sure I'll stay an amateur.....
let's just say this was a beeeeyotch of a project.
Next time I get the inkling to do something like this
I hope my hubs will remind me NOT TO!

Wednesday, October 27, 2010

~message center~


I've been working on some projects for my house
that I want to show you.

Keep in mind a couple things while viewing
any pictures I may post
of my house and things in it:

A) I am not a professional interior designer.
(as you'll obviously see-go easy on me)

B) I know there are tons of blogs where people
show their extravagant homes and projects they
do in them.....this isn't one of those blogs!
I prefer to "keep it real" (so does my wallet).
My house is not a magazine photo...it is real
and we have to live in it.

OK-now that I've got that disclaimer out of the way....
let me show you the new "message center" I have made for
a small little wall between our living room and kitchen area.
In the past I've had a dry-erase/cork board hanging here.
I saw an idea similar to this in a magazine a few months
back and wanted to do it. In the magazine the boards
were actually made out of cookie sheets.
I wanted something smaller than cookie sheets
and I found some clearance magnet boards at
The Wood Conn
ection for $3.46/board.

WITH THE NAKED EYE YOU CAN'T SEE WHERE THE MOD PODGE
UP TOP STOPS AS PROMINENTLY AS YOU CAN IN THE PHOTO.
IT MUST BE THE FLASH.
IT'S DRIVING ME NUTS IN THE PICS SO I WILL GO AND
SWIPE THE MOD PODGE UP TO THE TOP OF THE BOARD SO
YOU CAN'T SEE WHERE I
T ENDS.

Anyway, I mod podged some scrapbook paper onto two
of the magnet boards and painted the other one with
some chalkboard paint.
The decorative wood pieces are from a
secret treasure store of mine.
I have had the wood pieces and the chalkboard
paint for a long time so the only thing I had t
o
buy for this project were the magnet boards
and the spray paint for the wood (
$3).


Here it is with all my junk on it:
Did you notice the saying about discipline on the board?
I have to remind myself of this on a daily basis lately.
Three year olds are tough.

Total Pageviews